Timeline
Fall 2022
14 Weeks
Brief
Create a fully functional speaker out of existing components.
Tools
Model Shop
Illustrator
It Plays!
Song: Piel Canela by Bobby Capó
Understanding the Original Components
Prototype 1 Goals

Understanding how the original Speaker works

Learning how to seal components for better sound quality

Learning and experimenting on the machines in the shop
Learning about the components
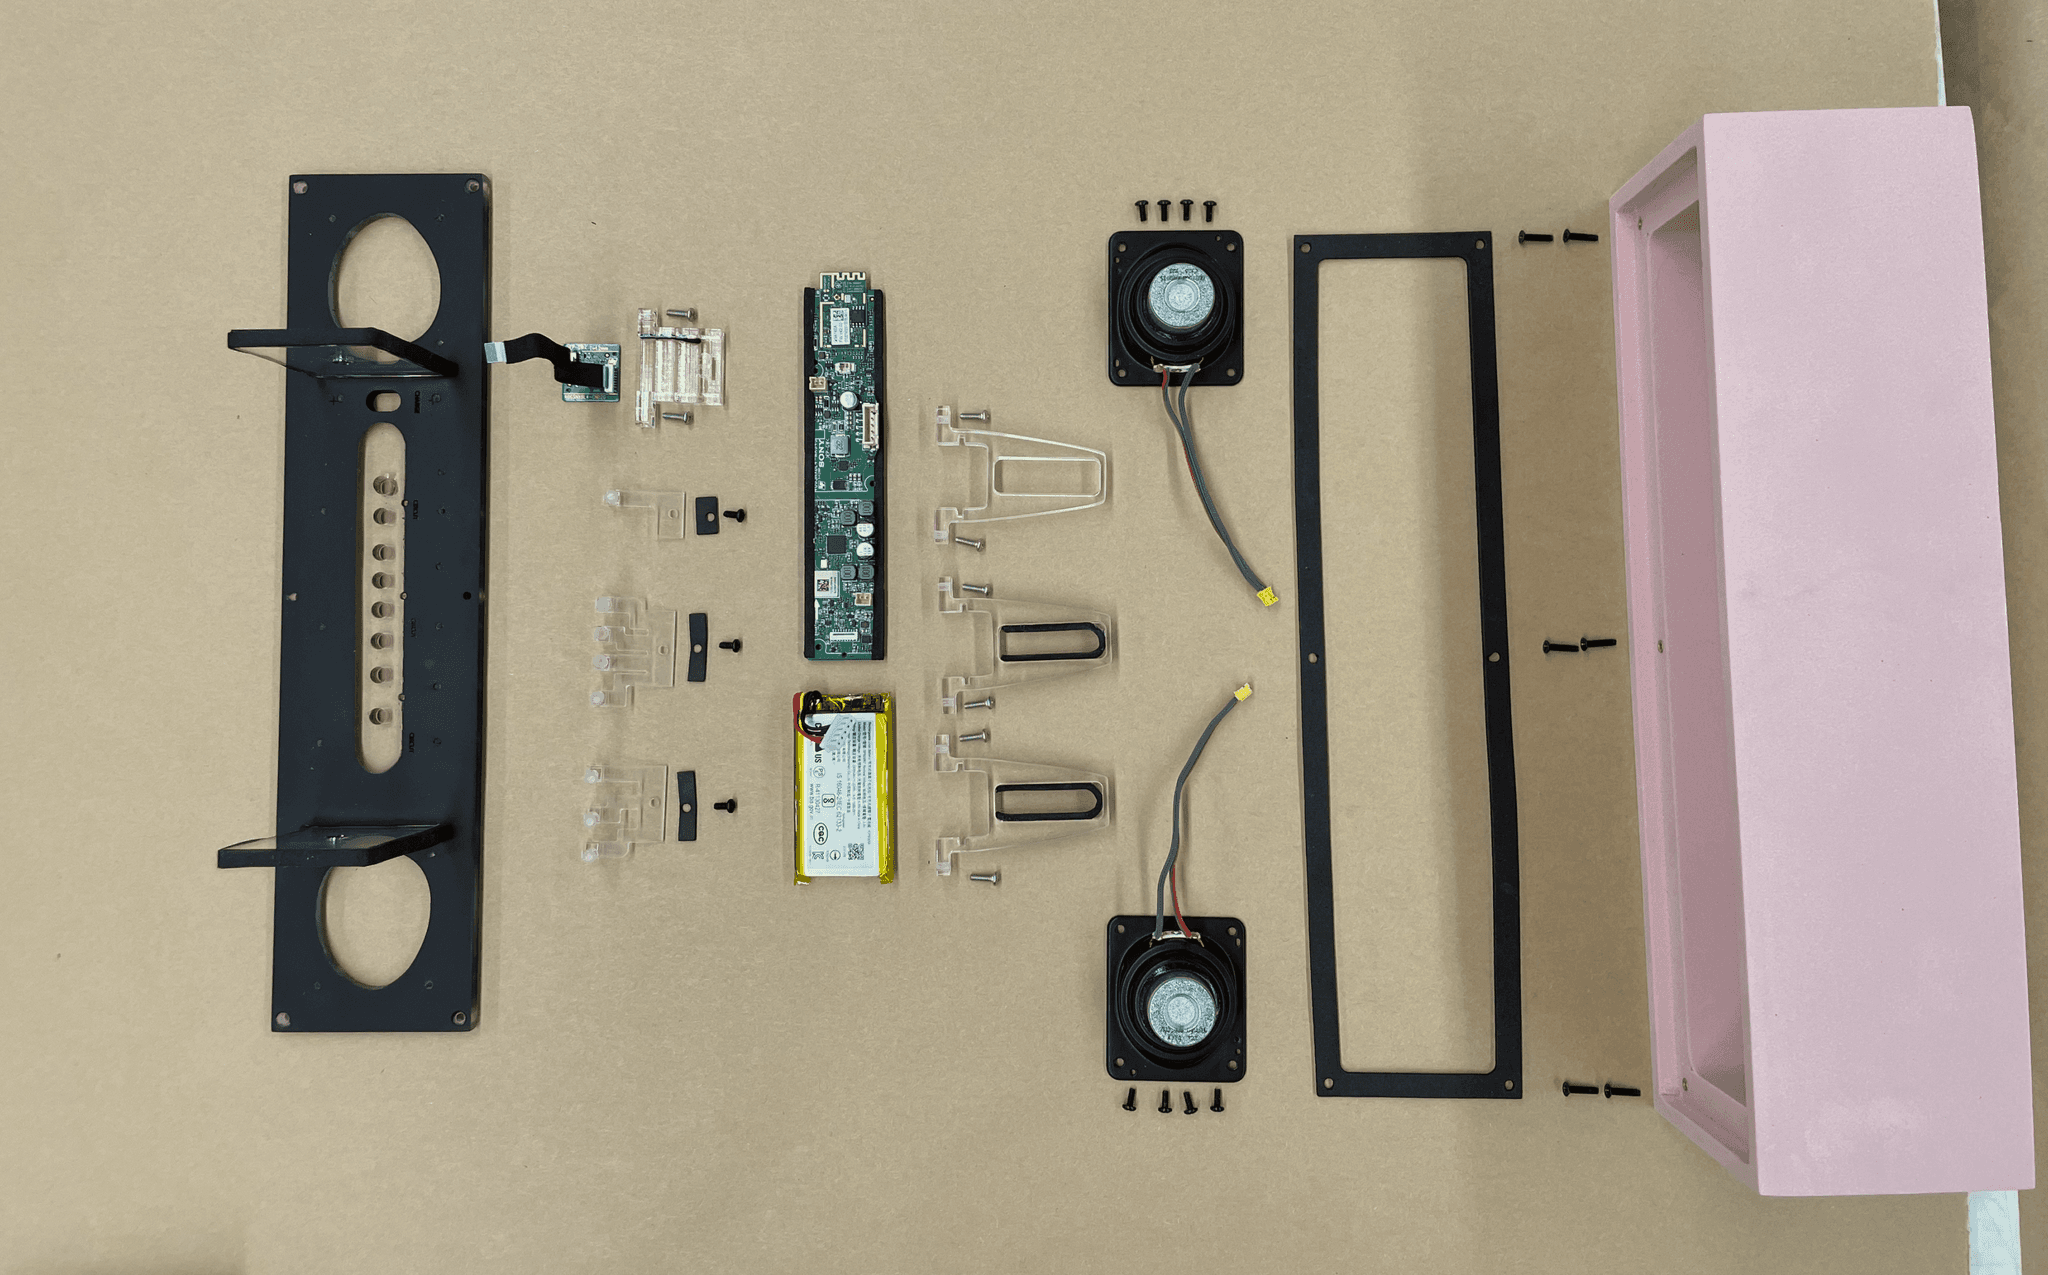
We took apart the Sony SRS-XB23, portable speaker, to learn how the components worked together, and learn how the speaker was sealed and put together.


Reverse Engineering
Quick mockups to learn how the components interact with each other, to keep in mind when I design my own.
Brain Storming
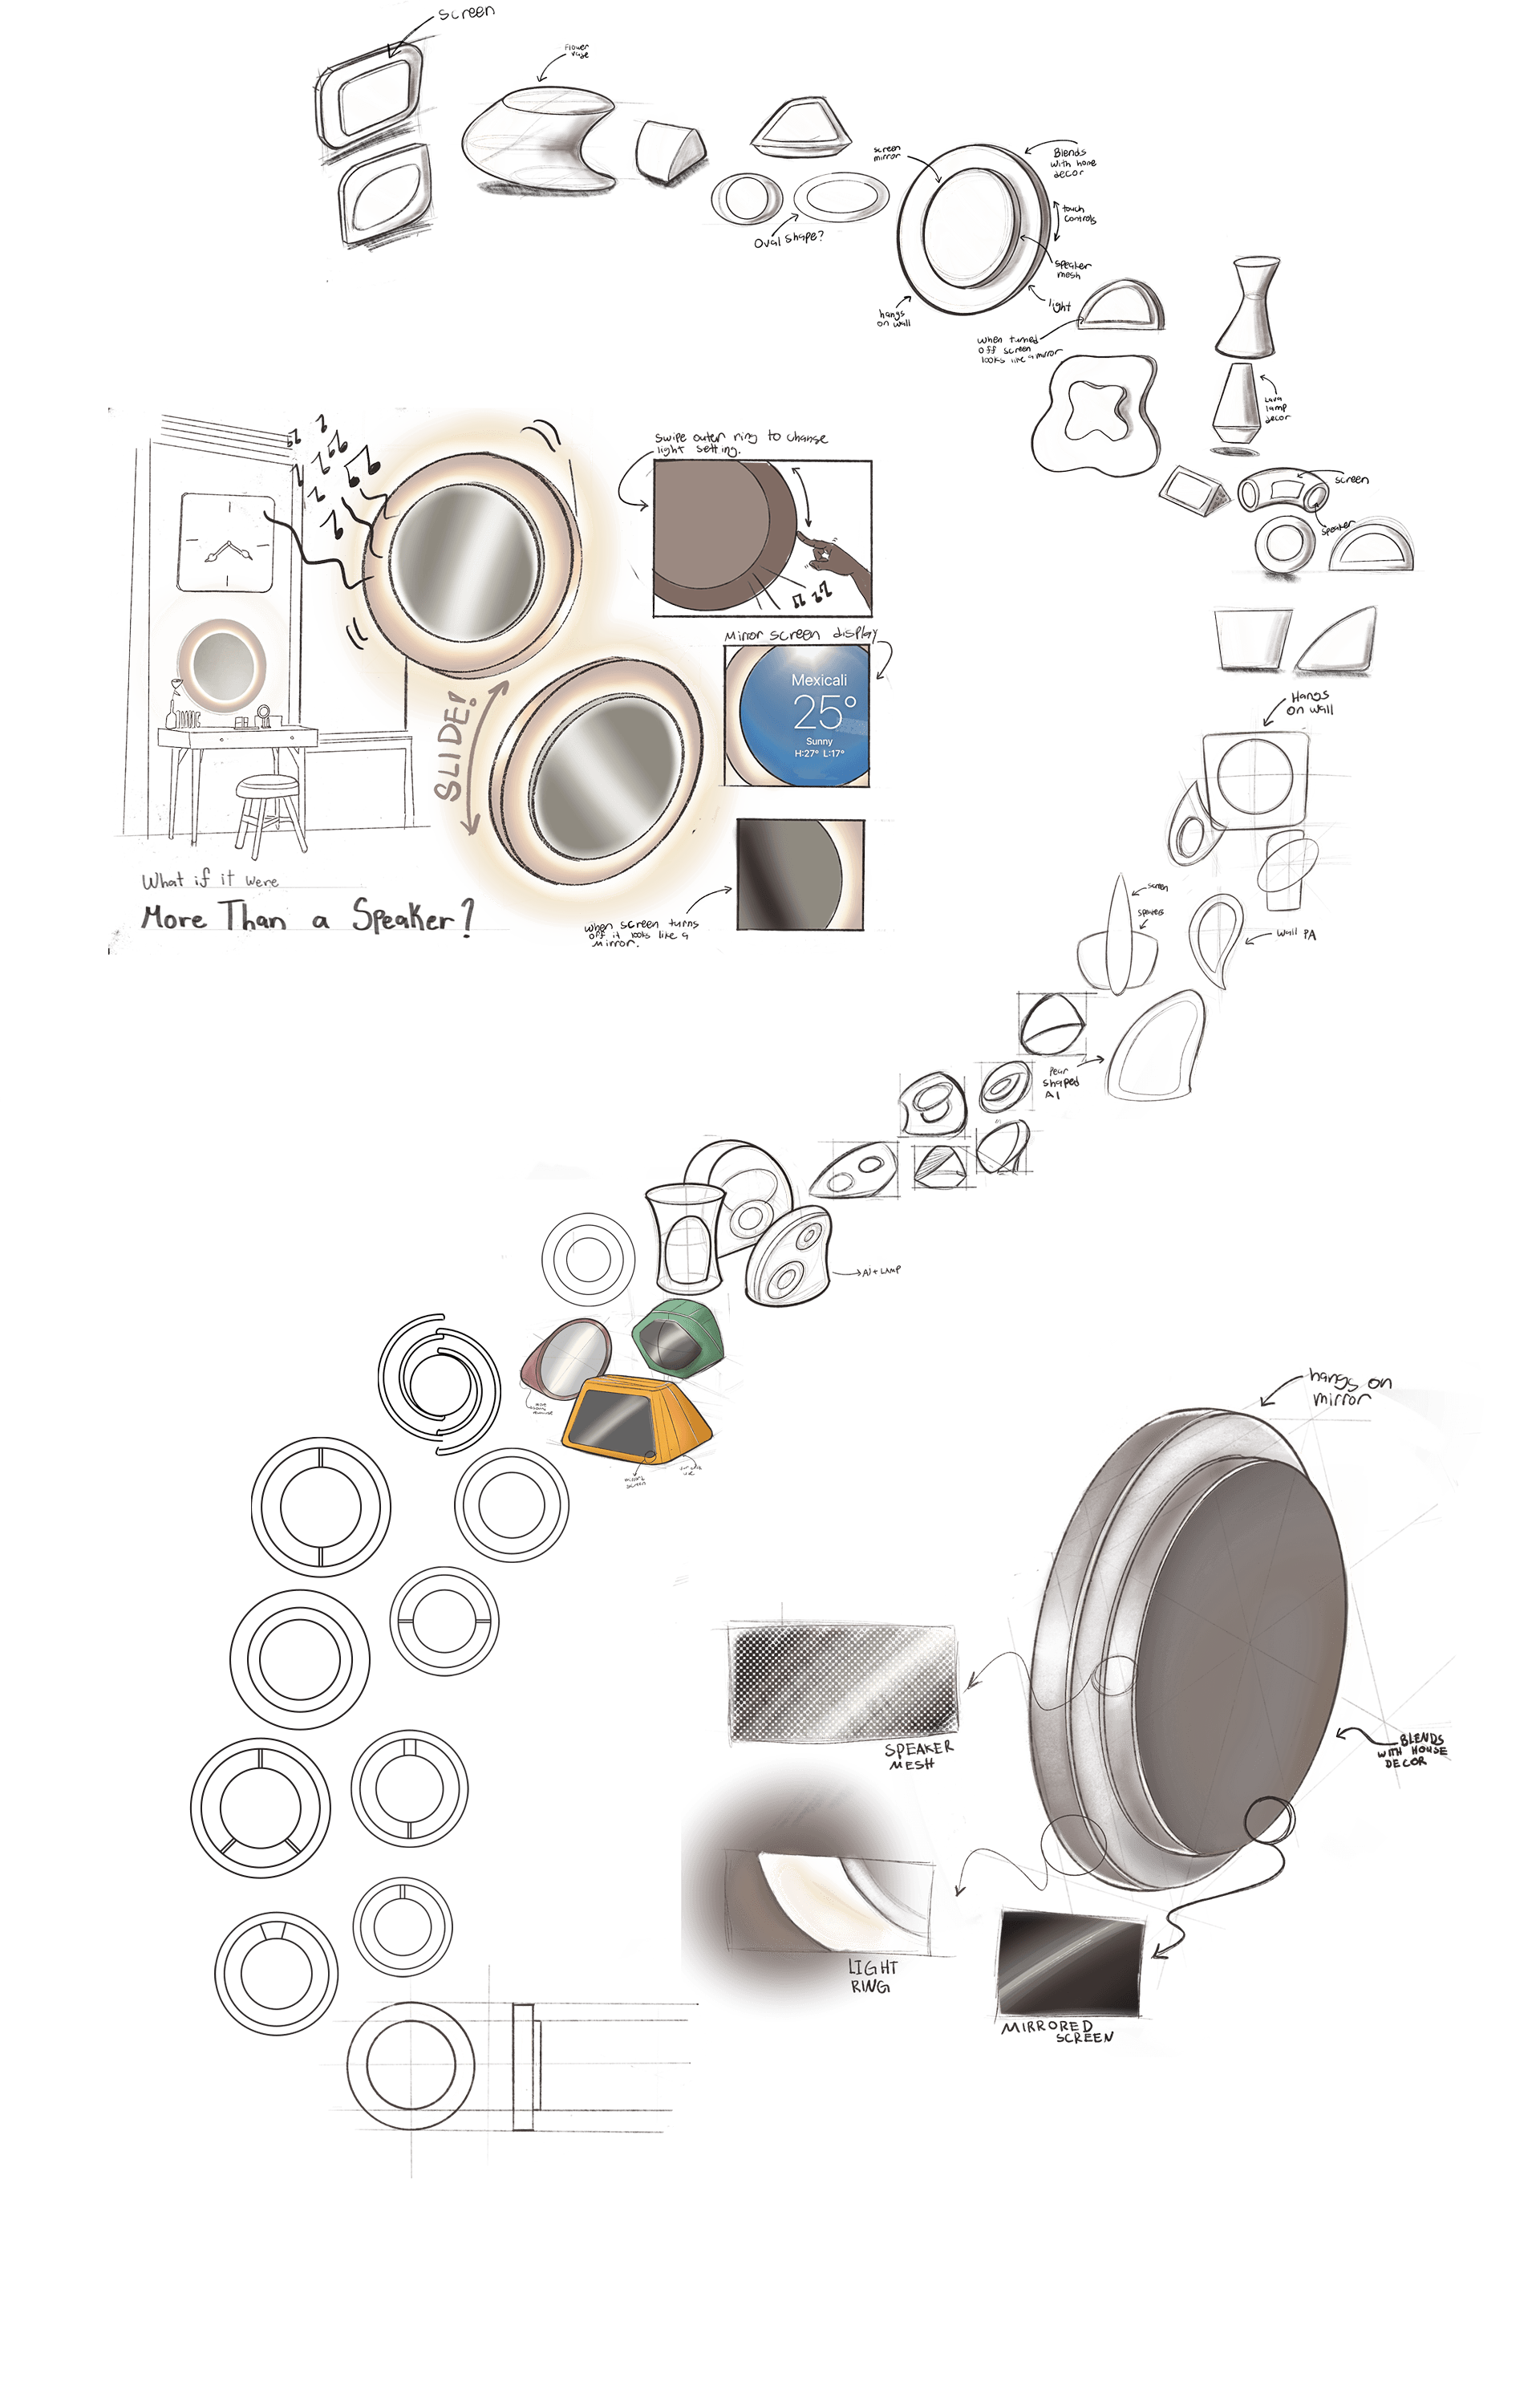


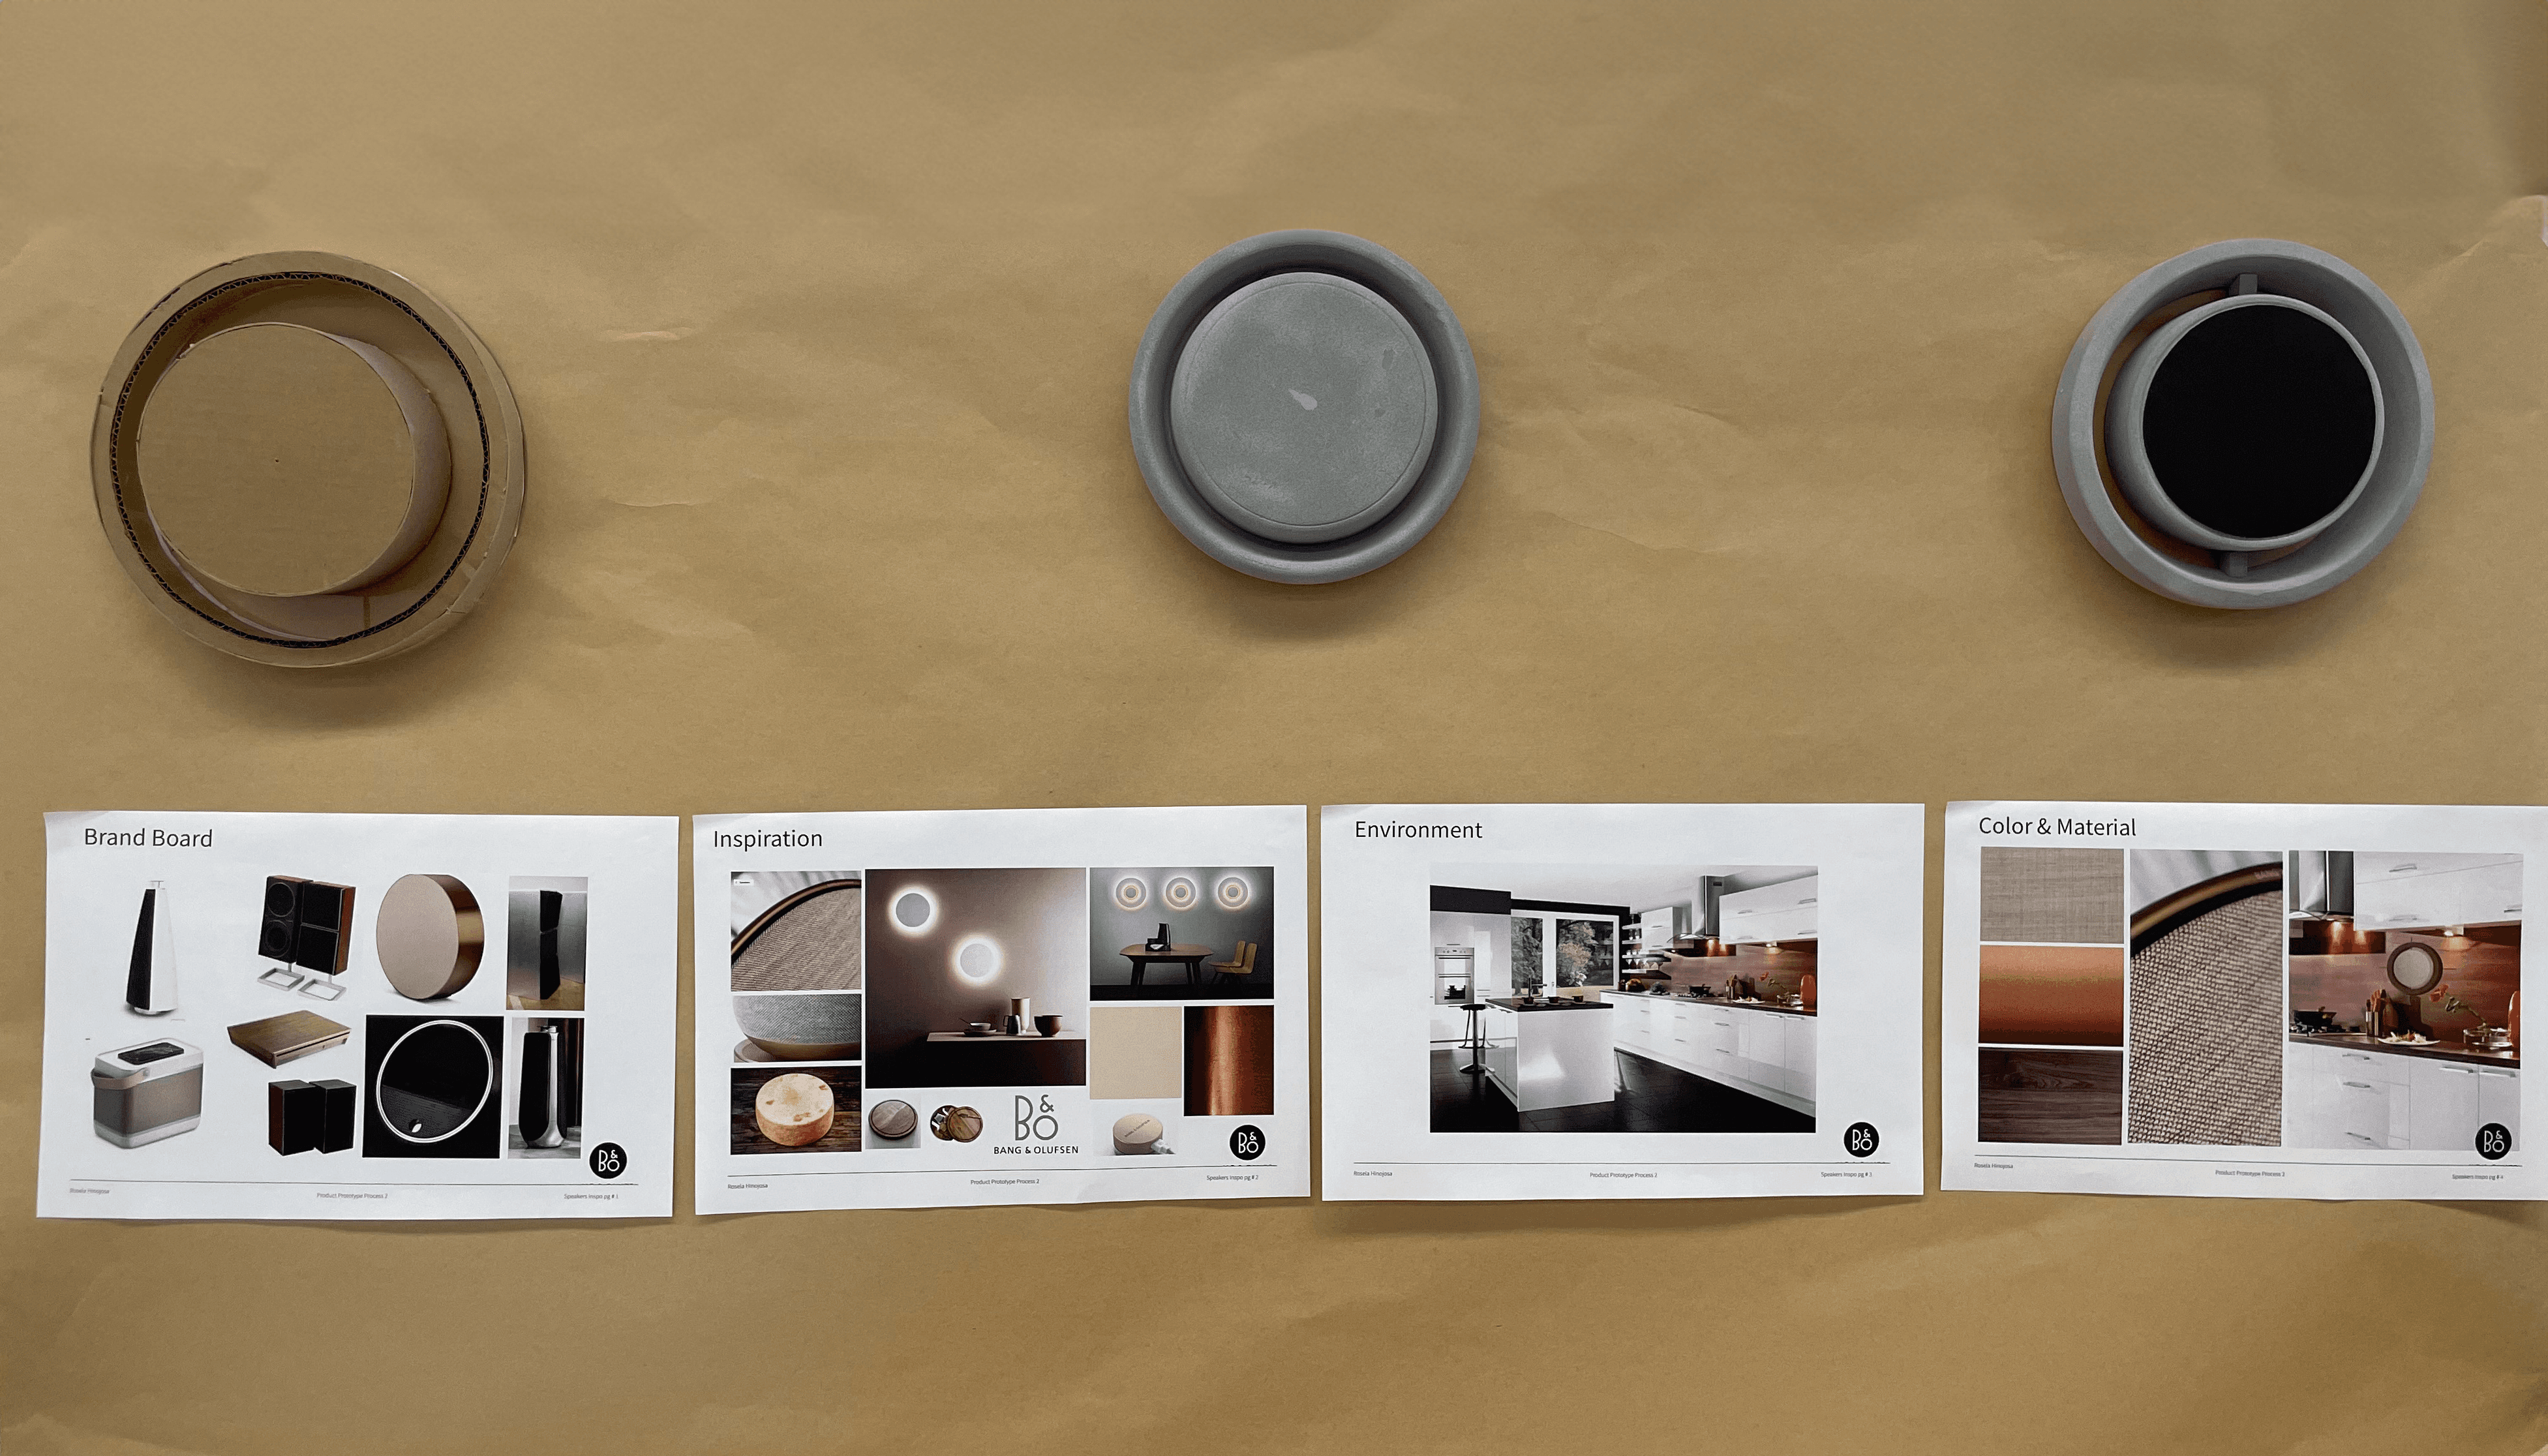
Visual models
Created a variety of models to indicate the visual language of the speaker.
Functional Models
How can I fit in the components of the speaker in the circular shape that I need?


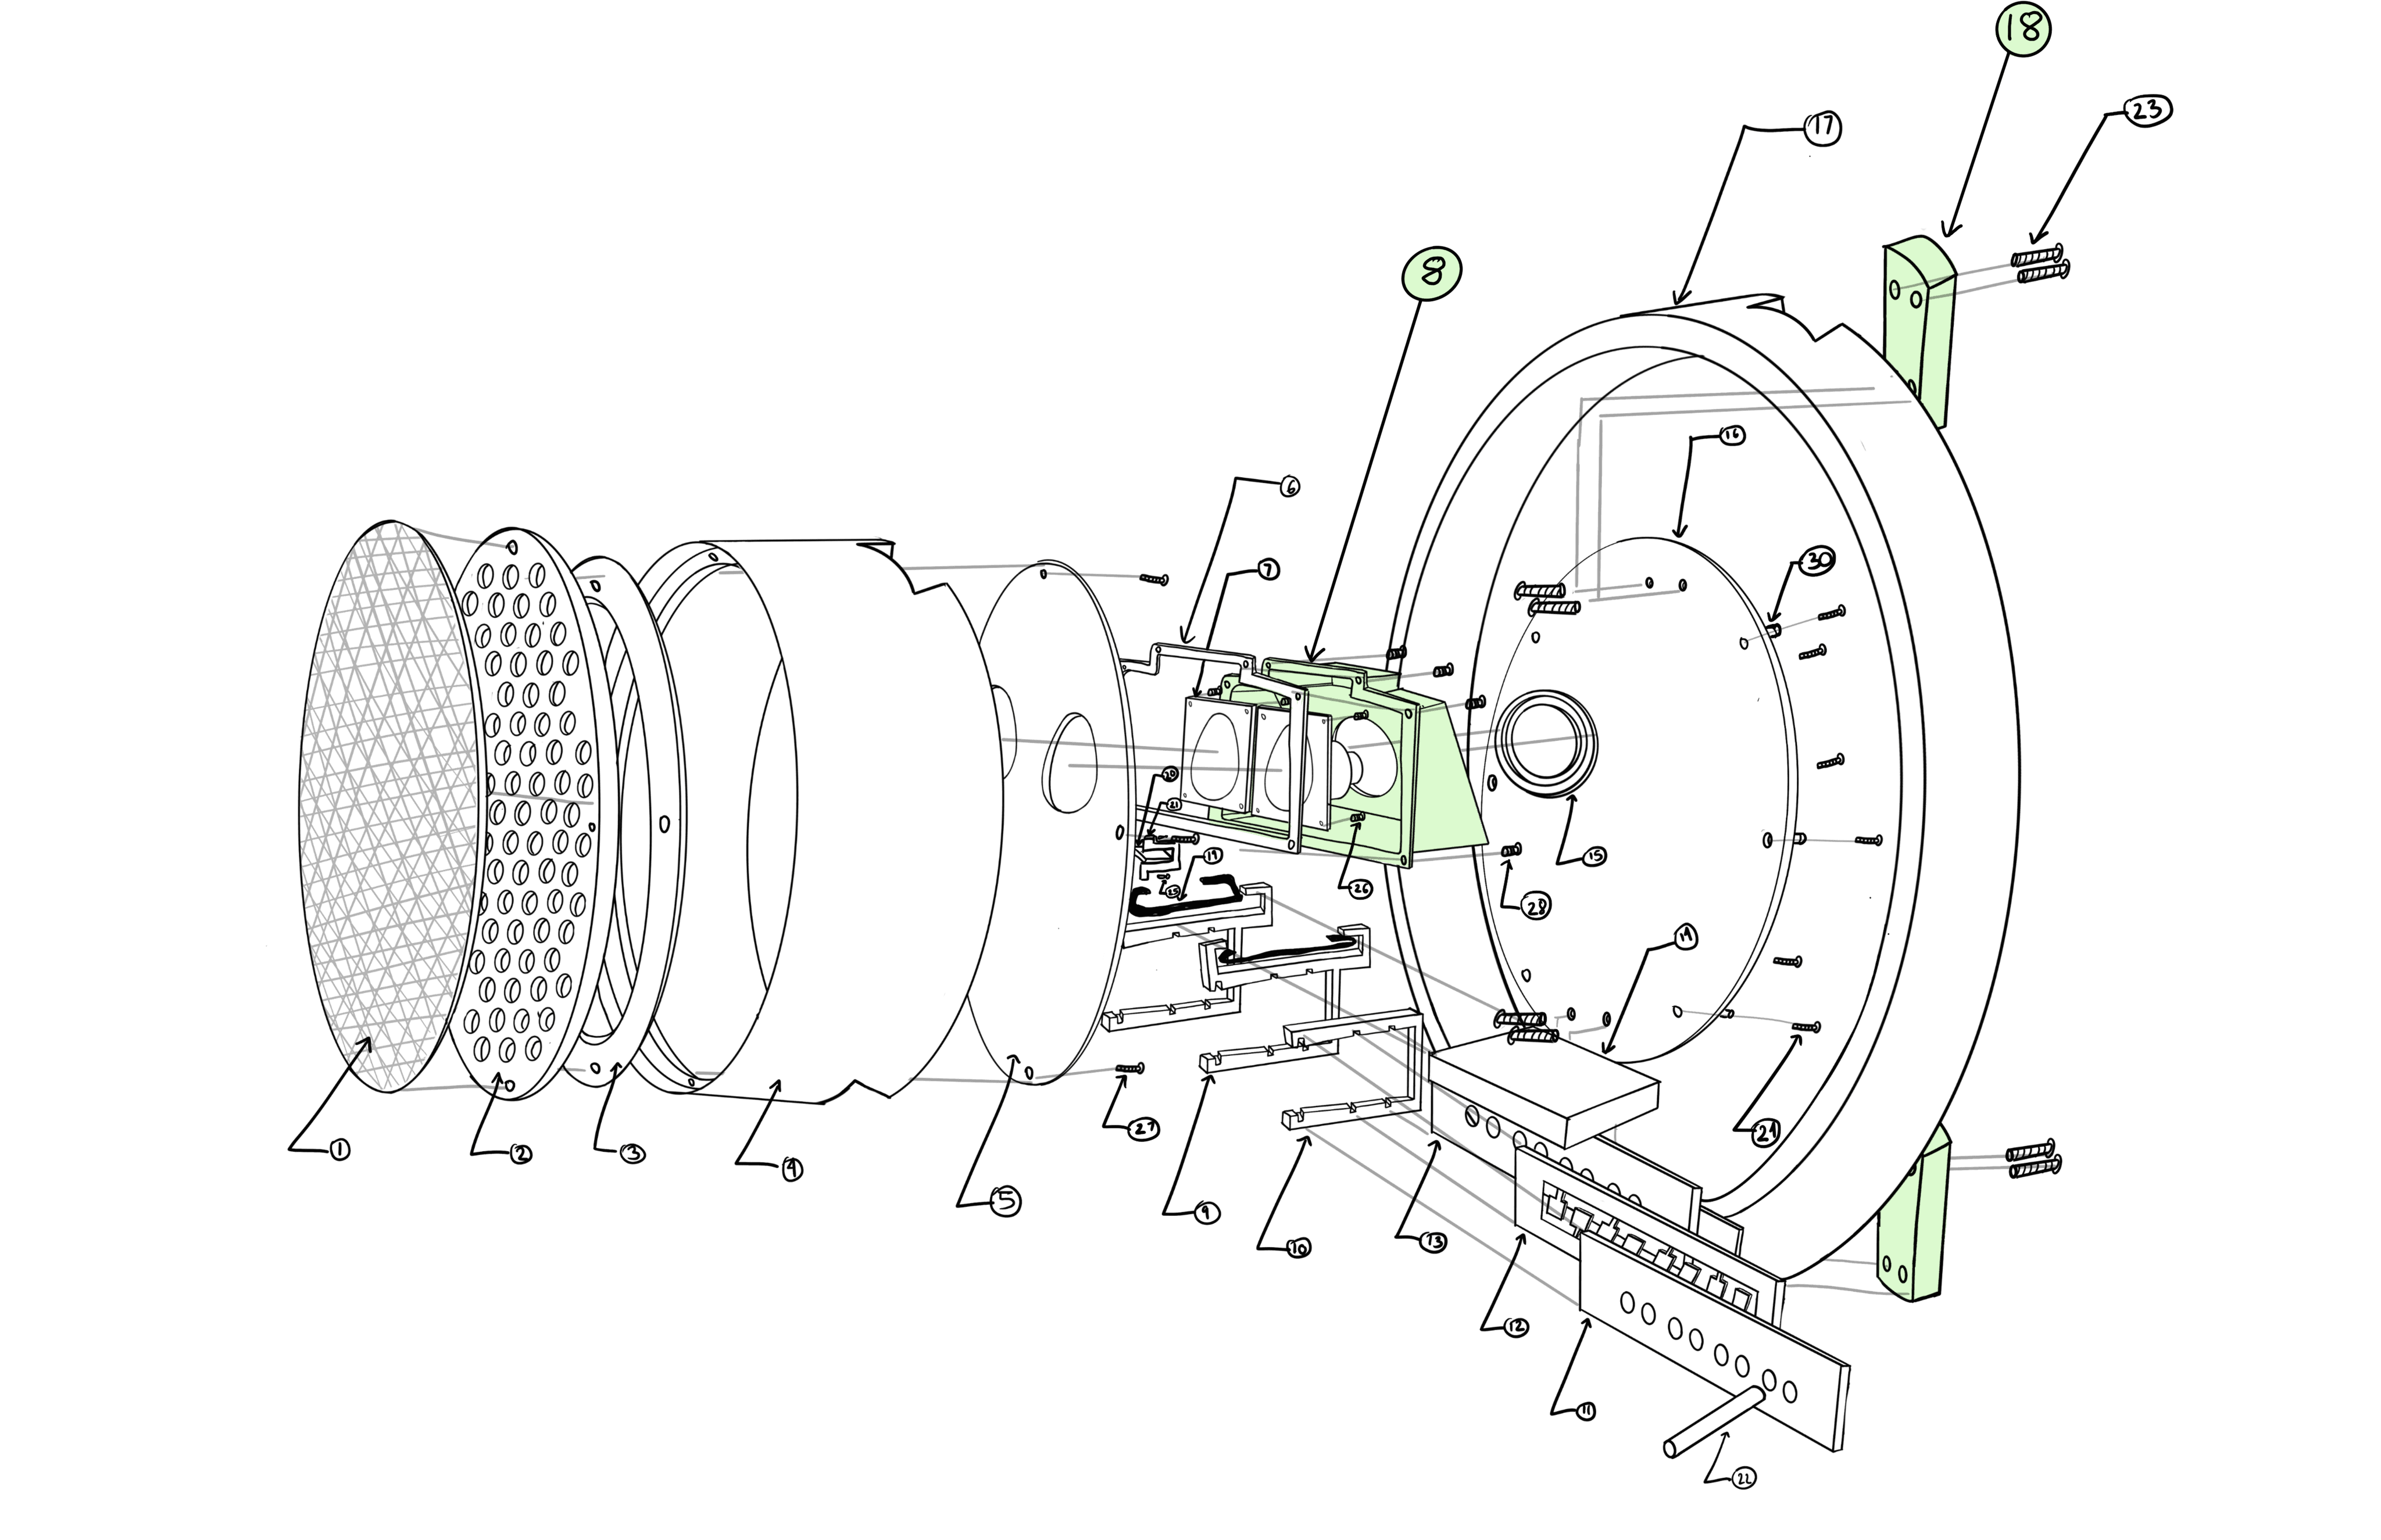
Semi-Final Variation
Explanation
There was no space for piece 8 and the seal. I created piece 18 to hold the Halo together, but this made the Halo purely aesthetic, which wasn't my goal.
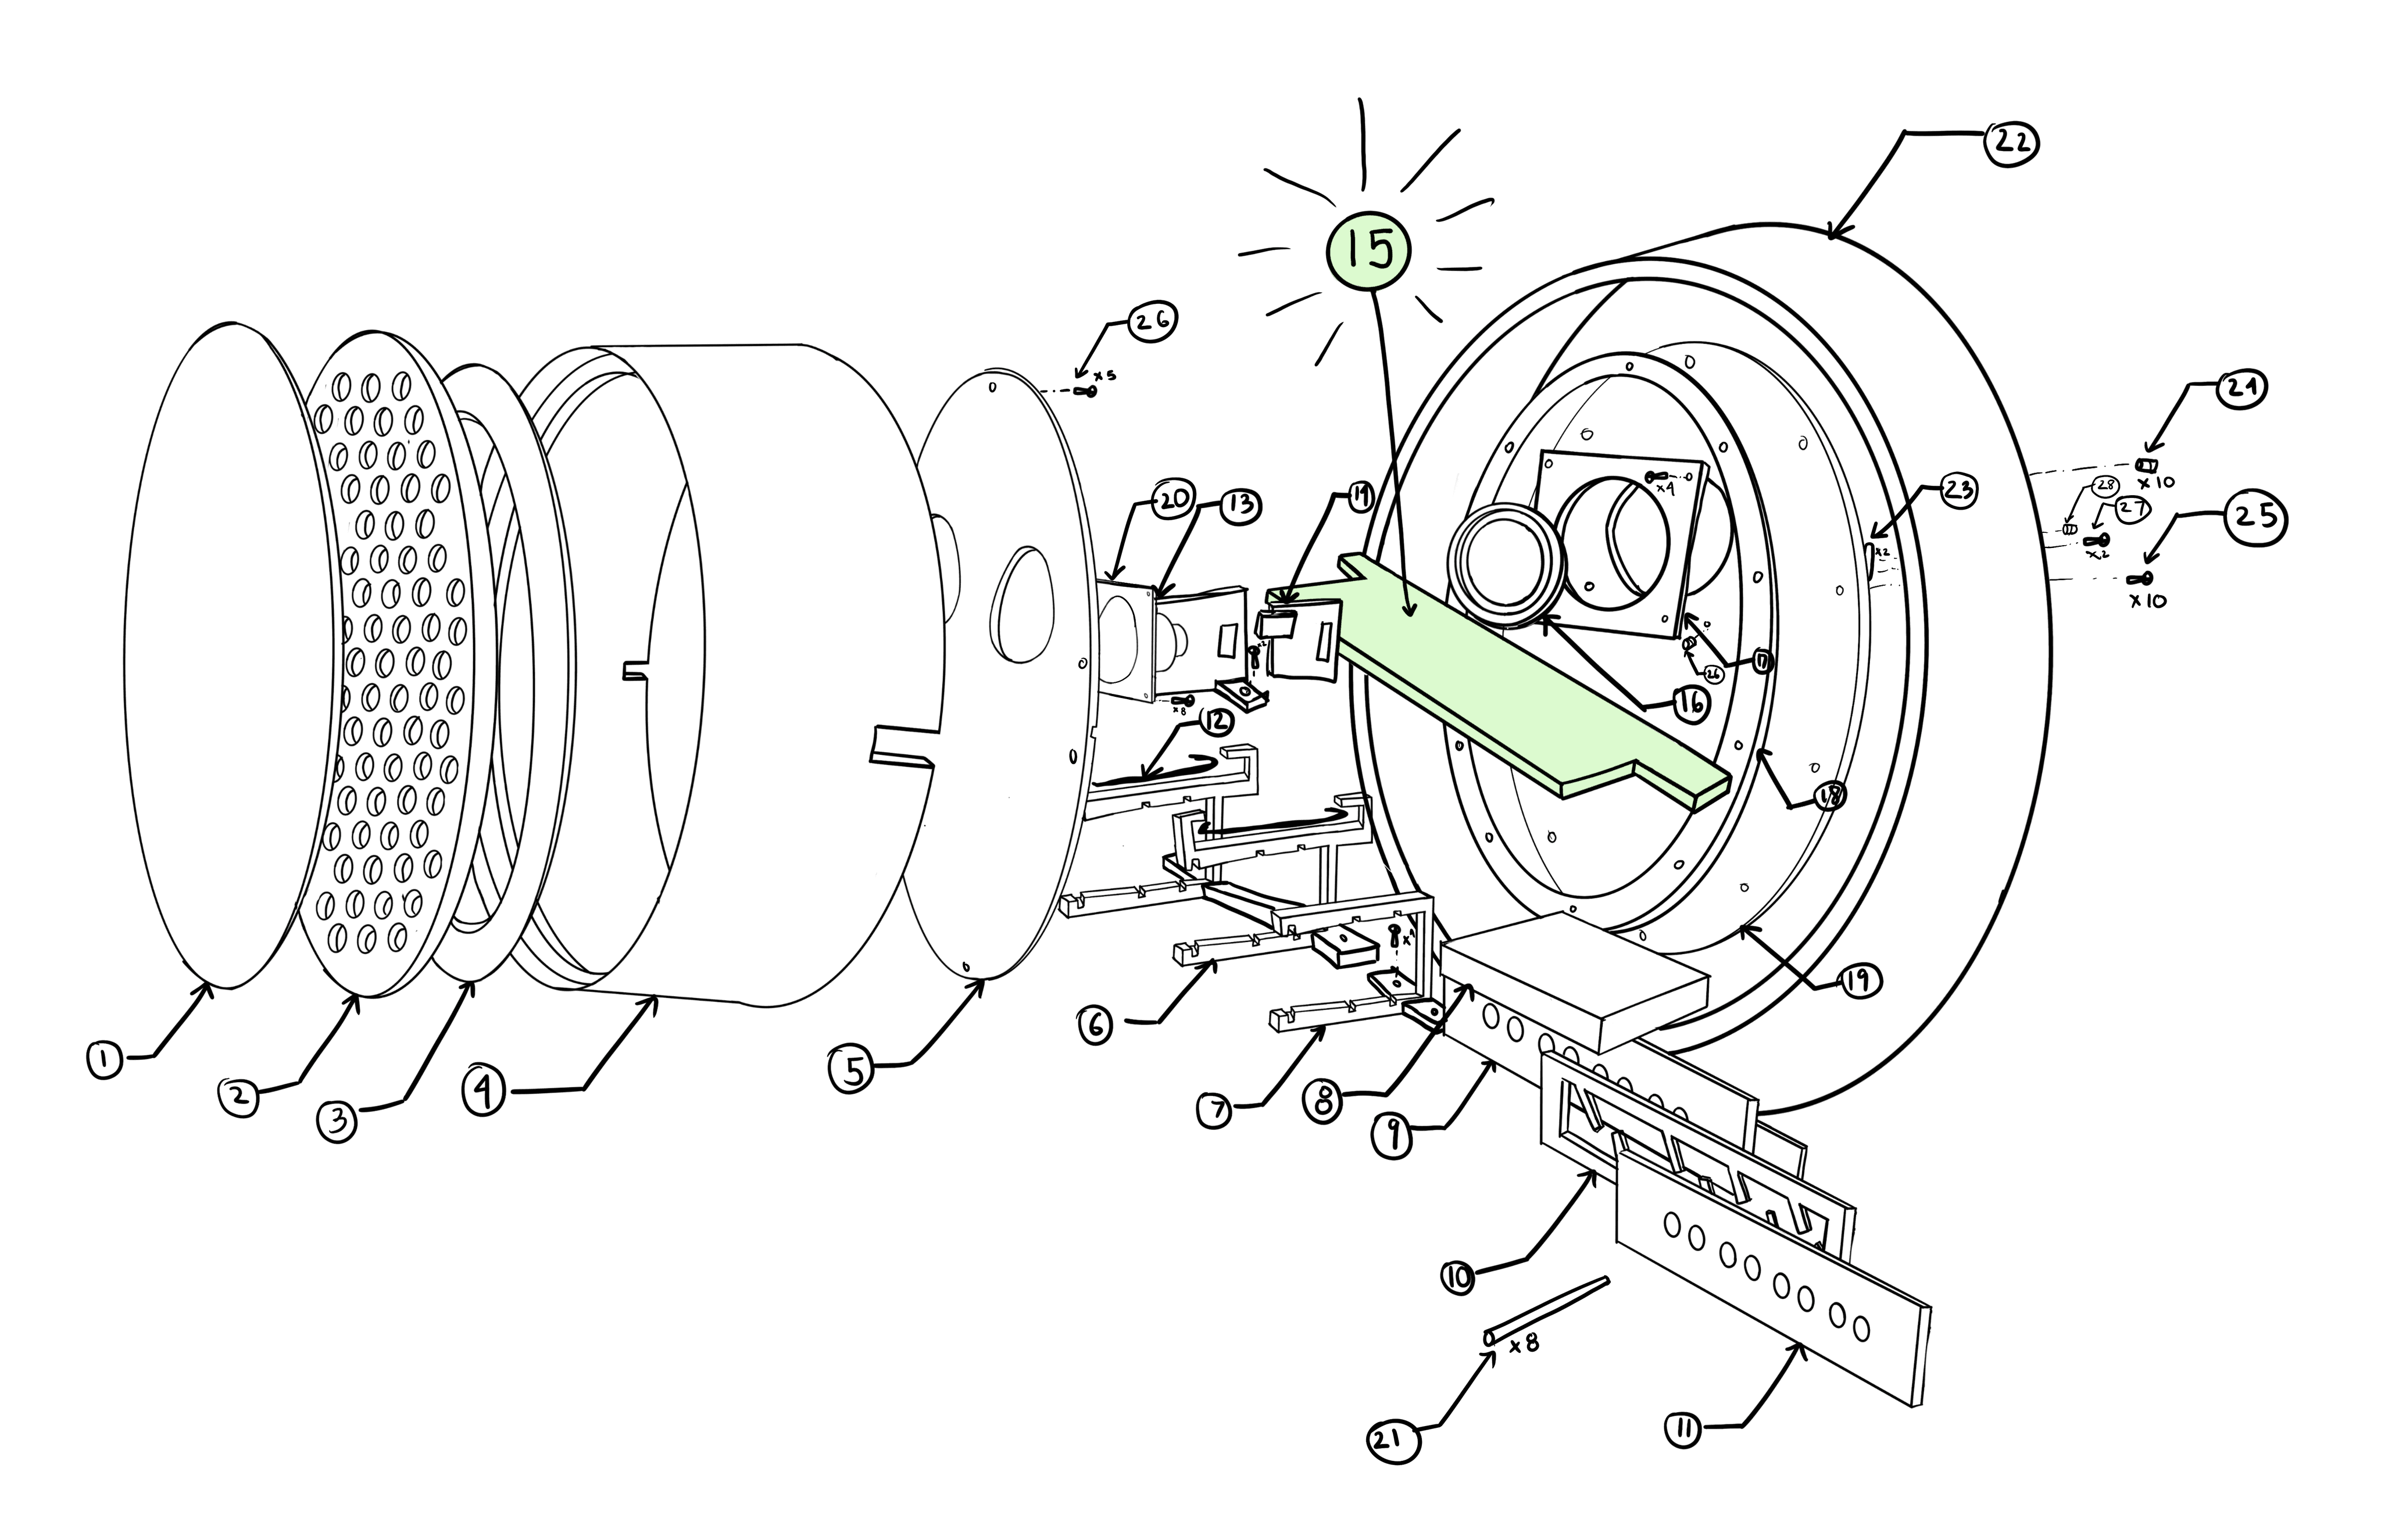
Final Variation
Explanation
Piece 15 solves the problem, it gives the Halo a function, so it can hold the seal while also giving it the suspended feeling without the need of screws and extra pieces.


Final Variation
Pictures
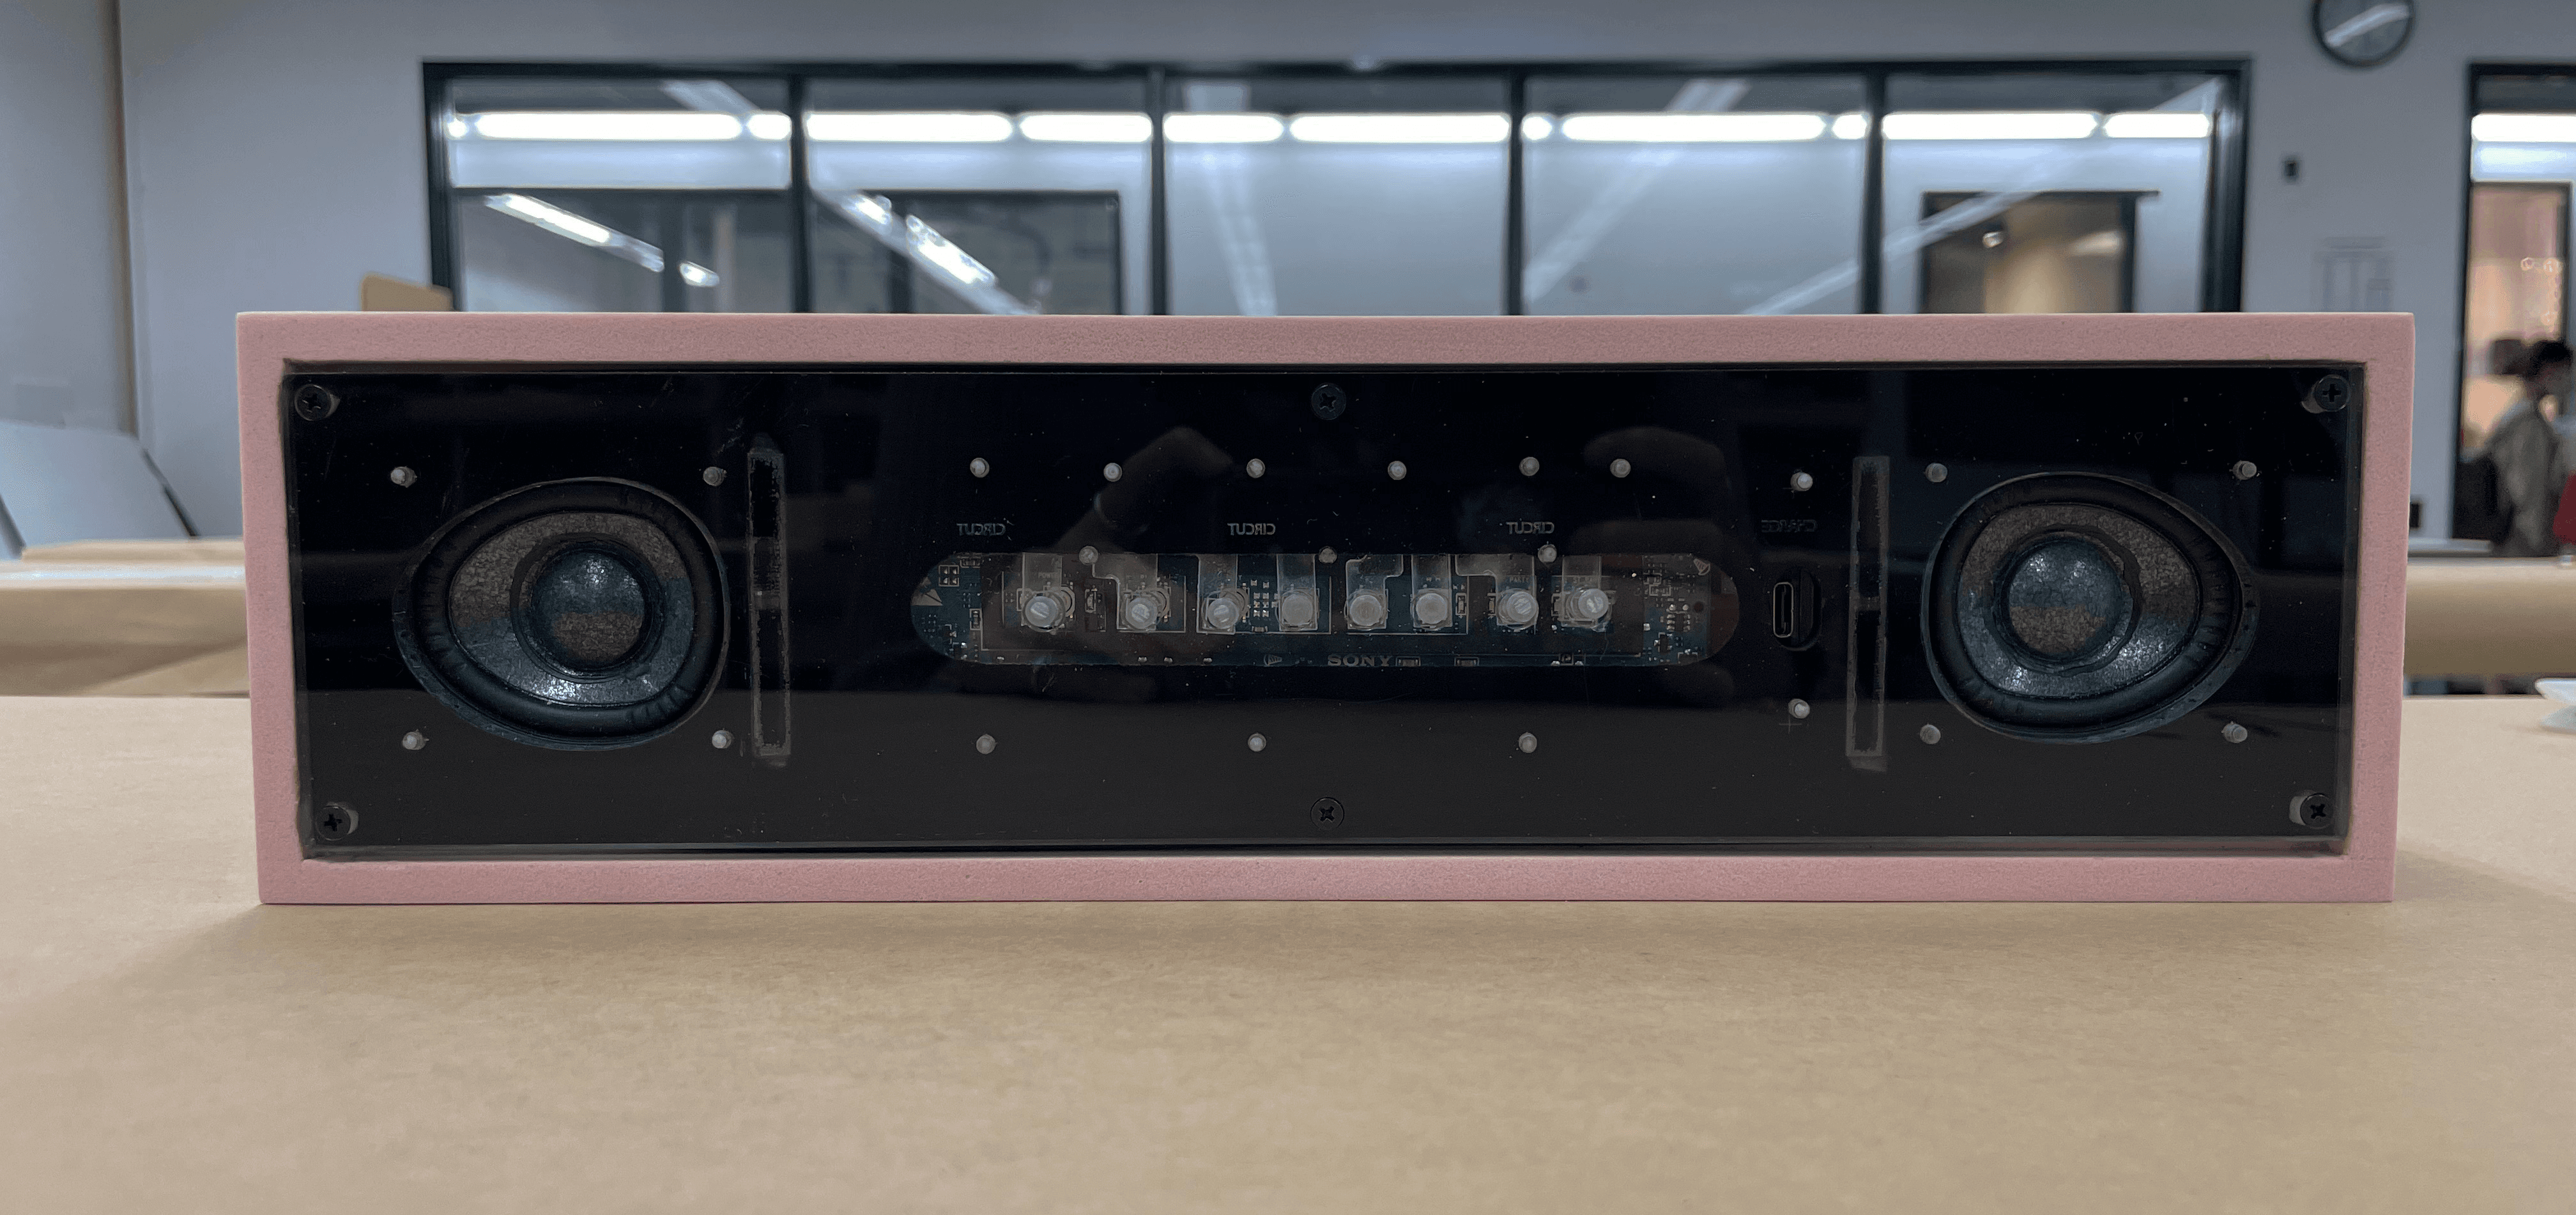
Take a look at the final speaker from the inside!
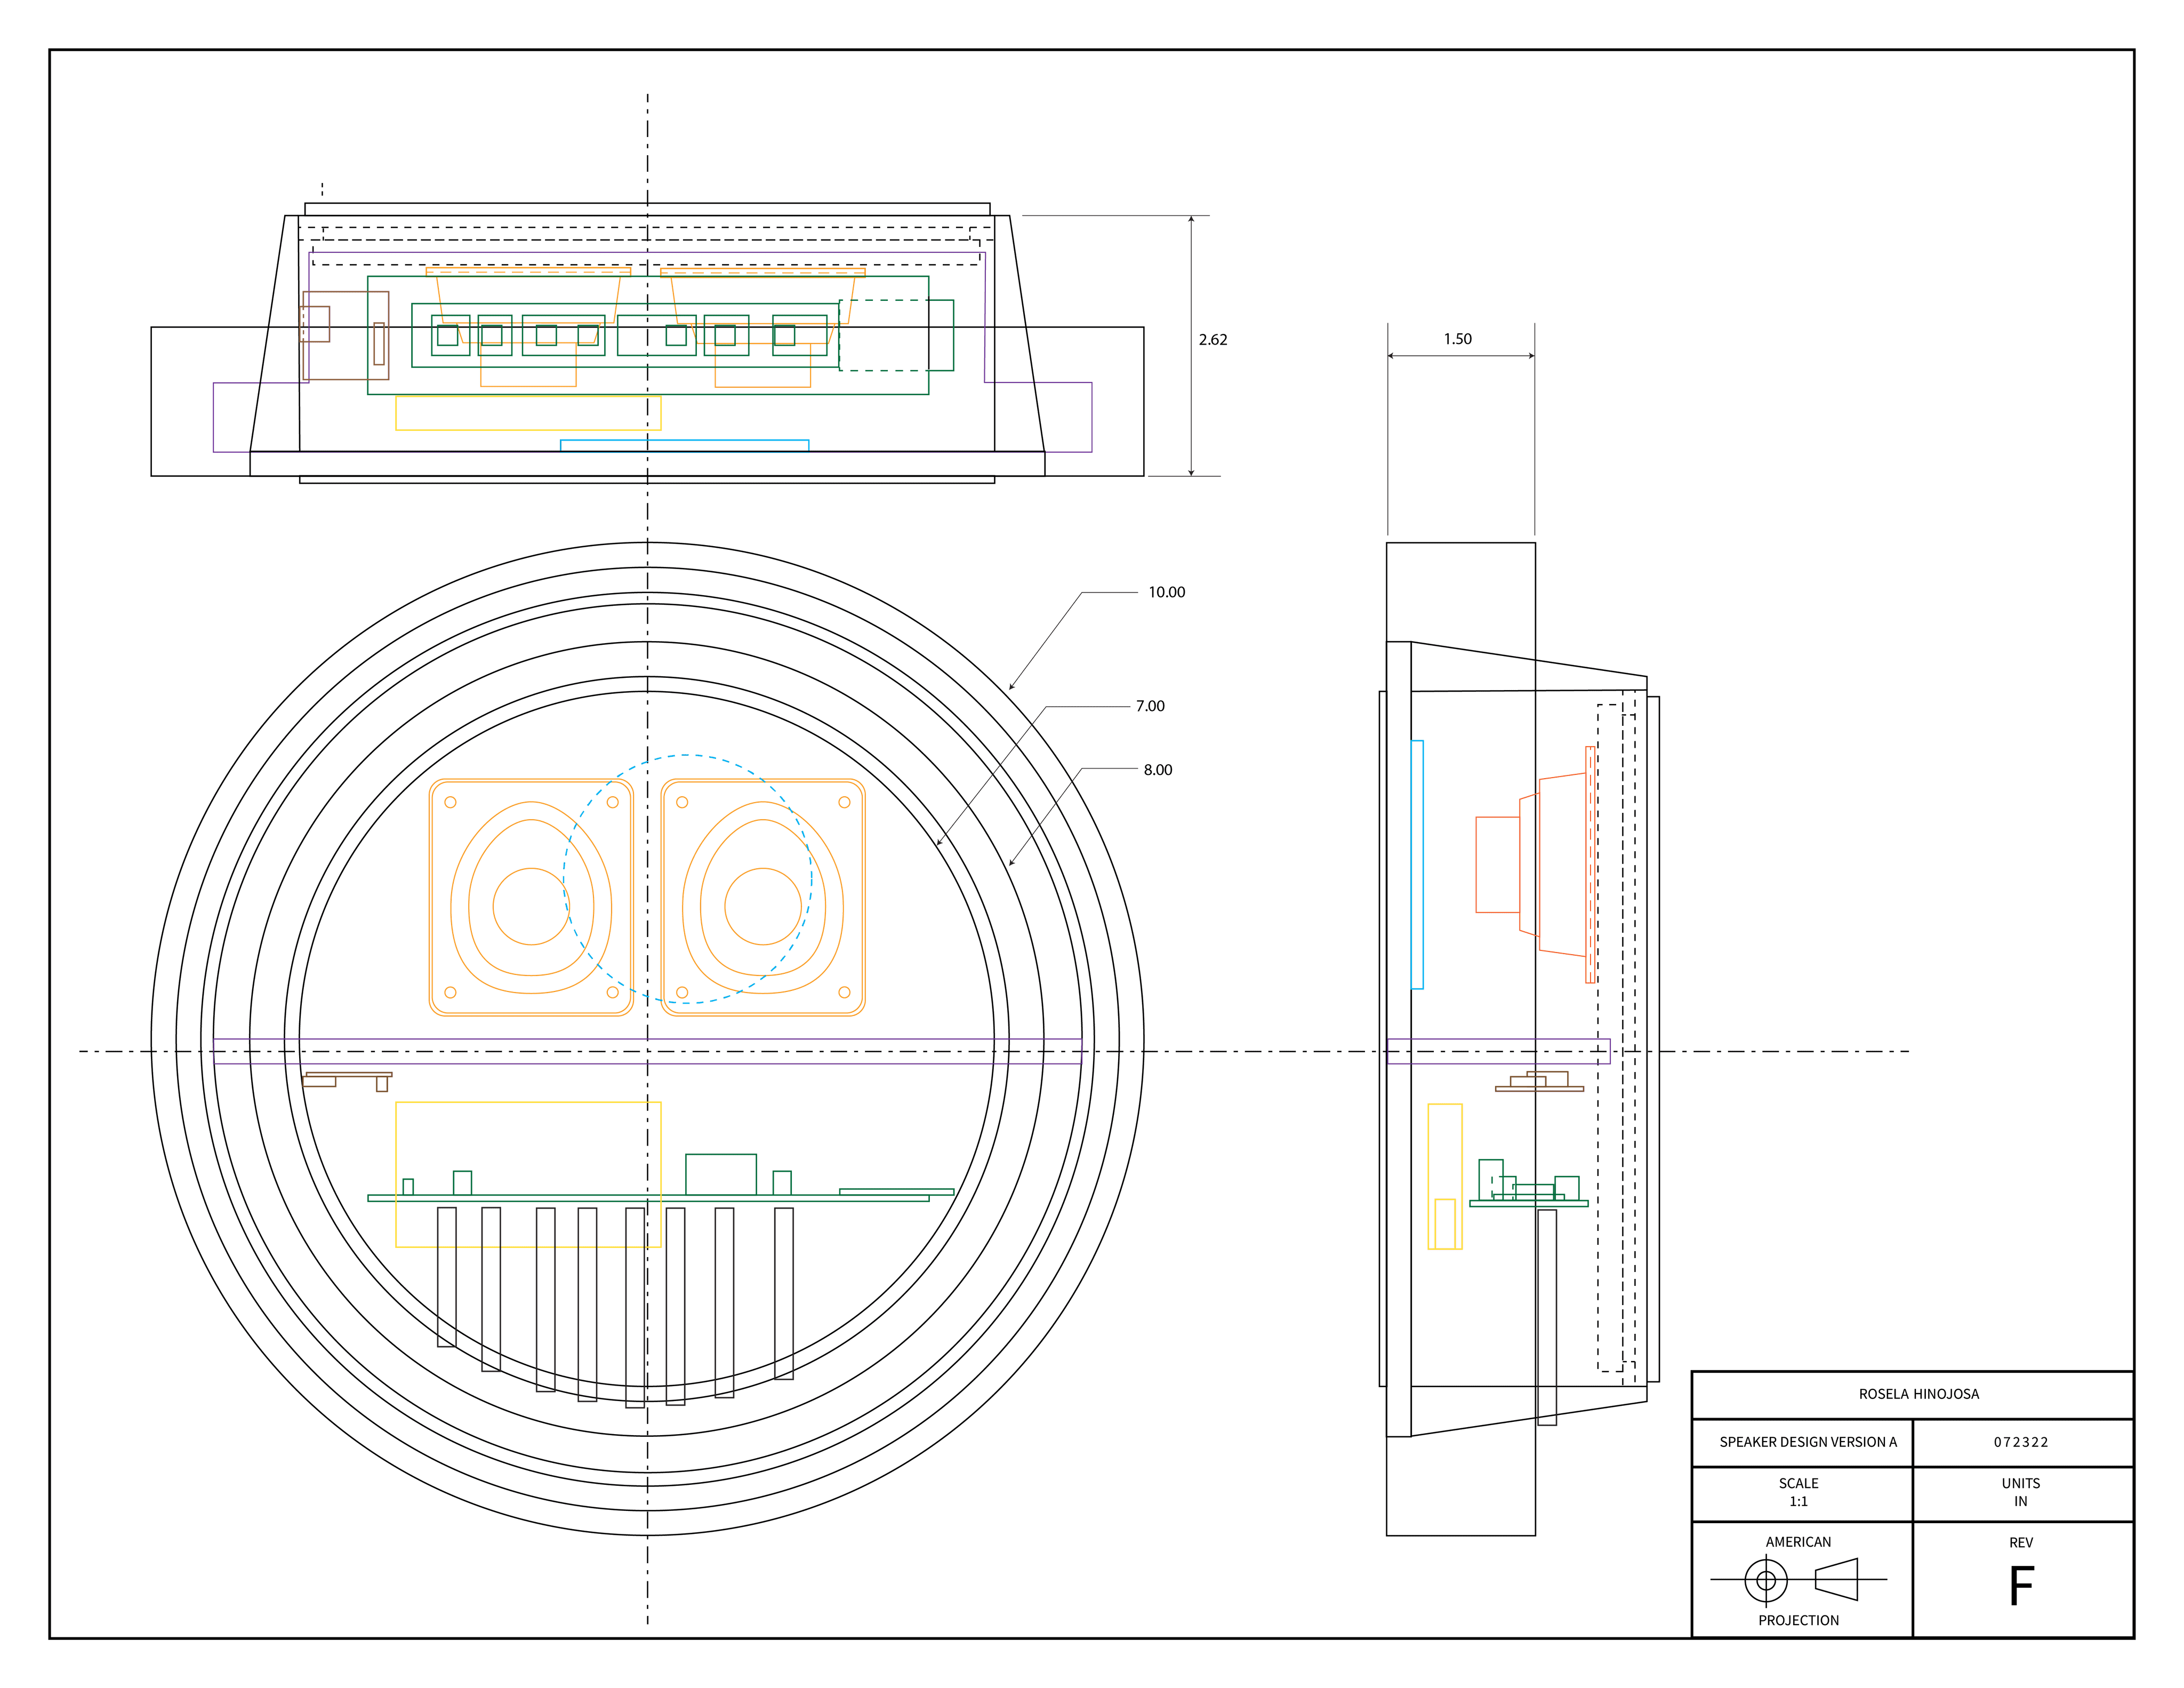
Reference Drawing
The orthographic drawings were especially useful for the construction of the model, they served as reference and for double checking measurements.
How it Assembles
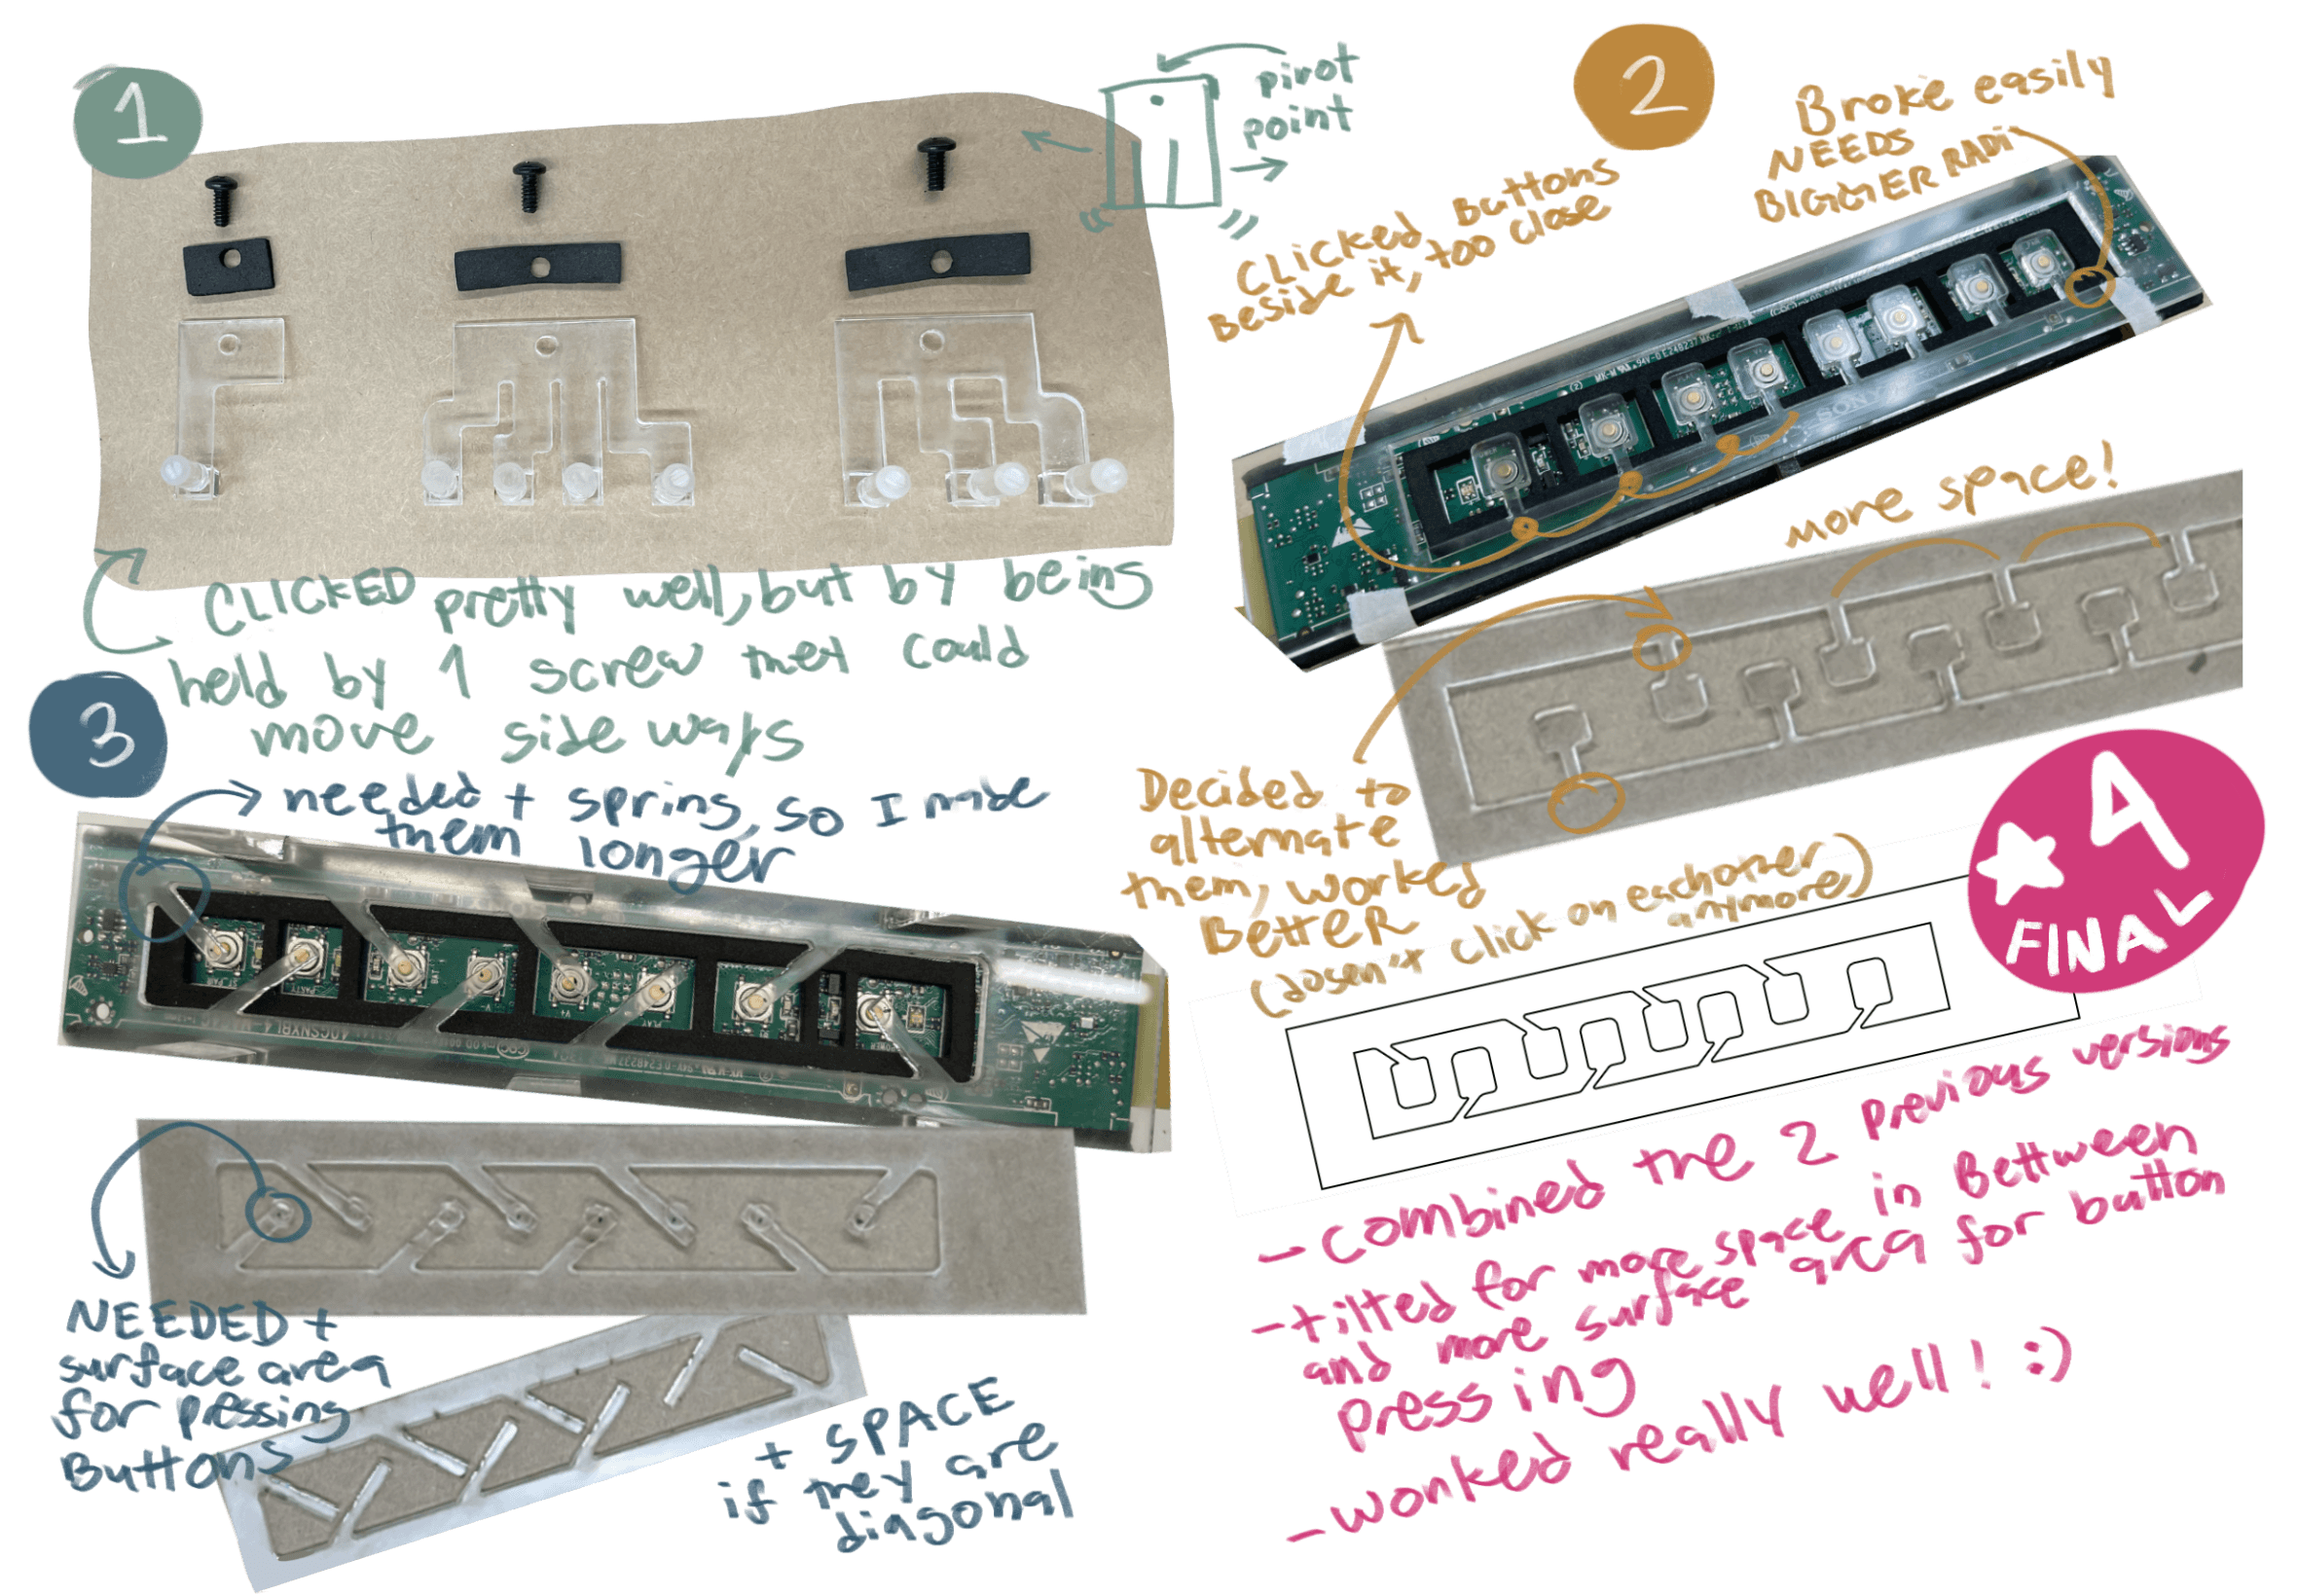
Notes on Designing the Springboard
Rough progress on how the springboard was refined.
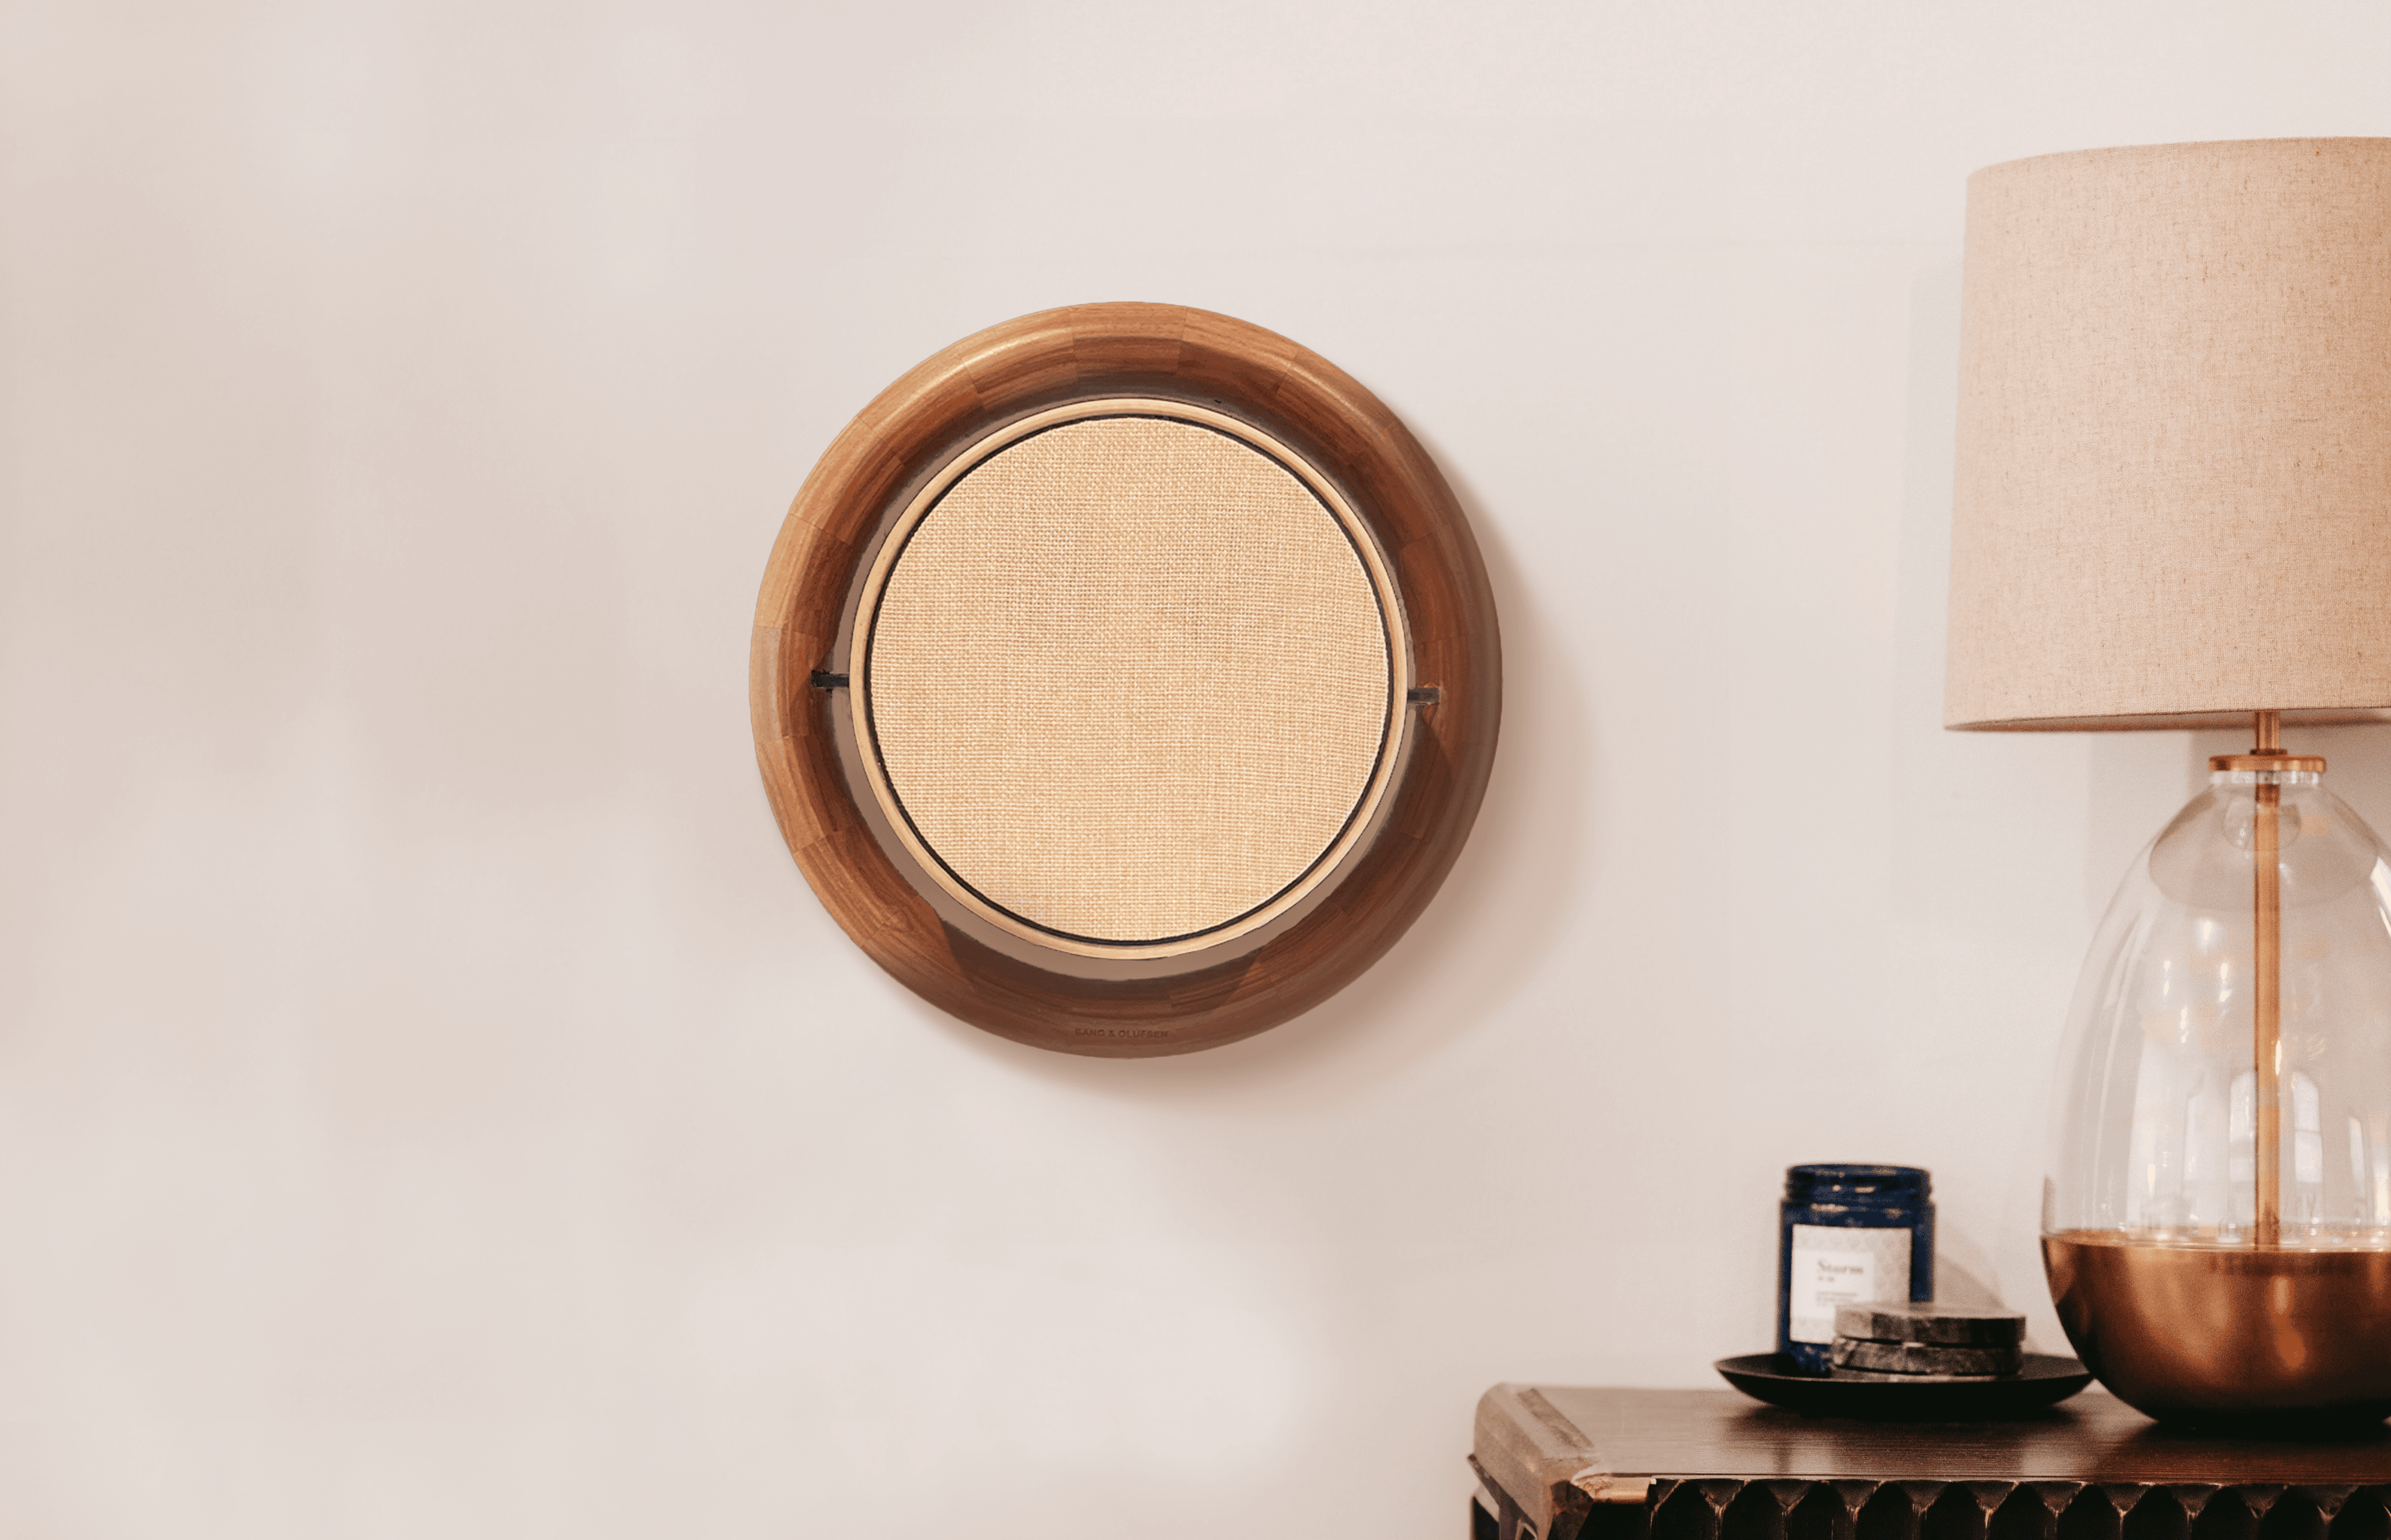
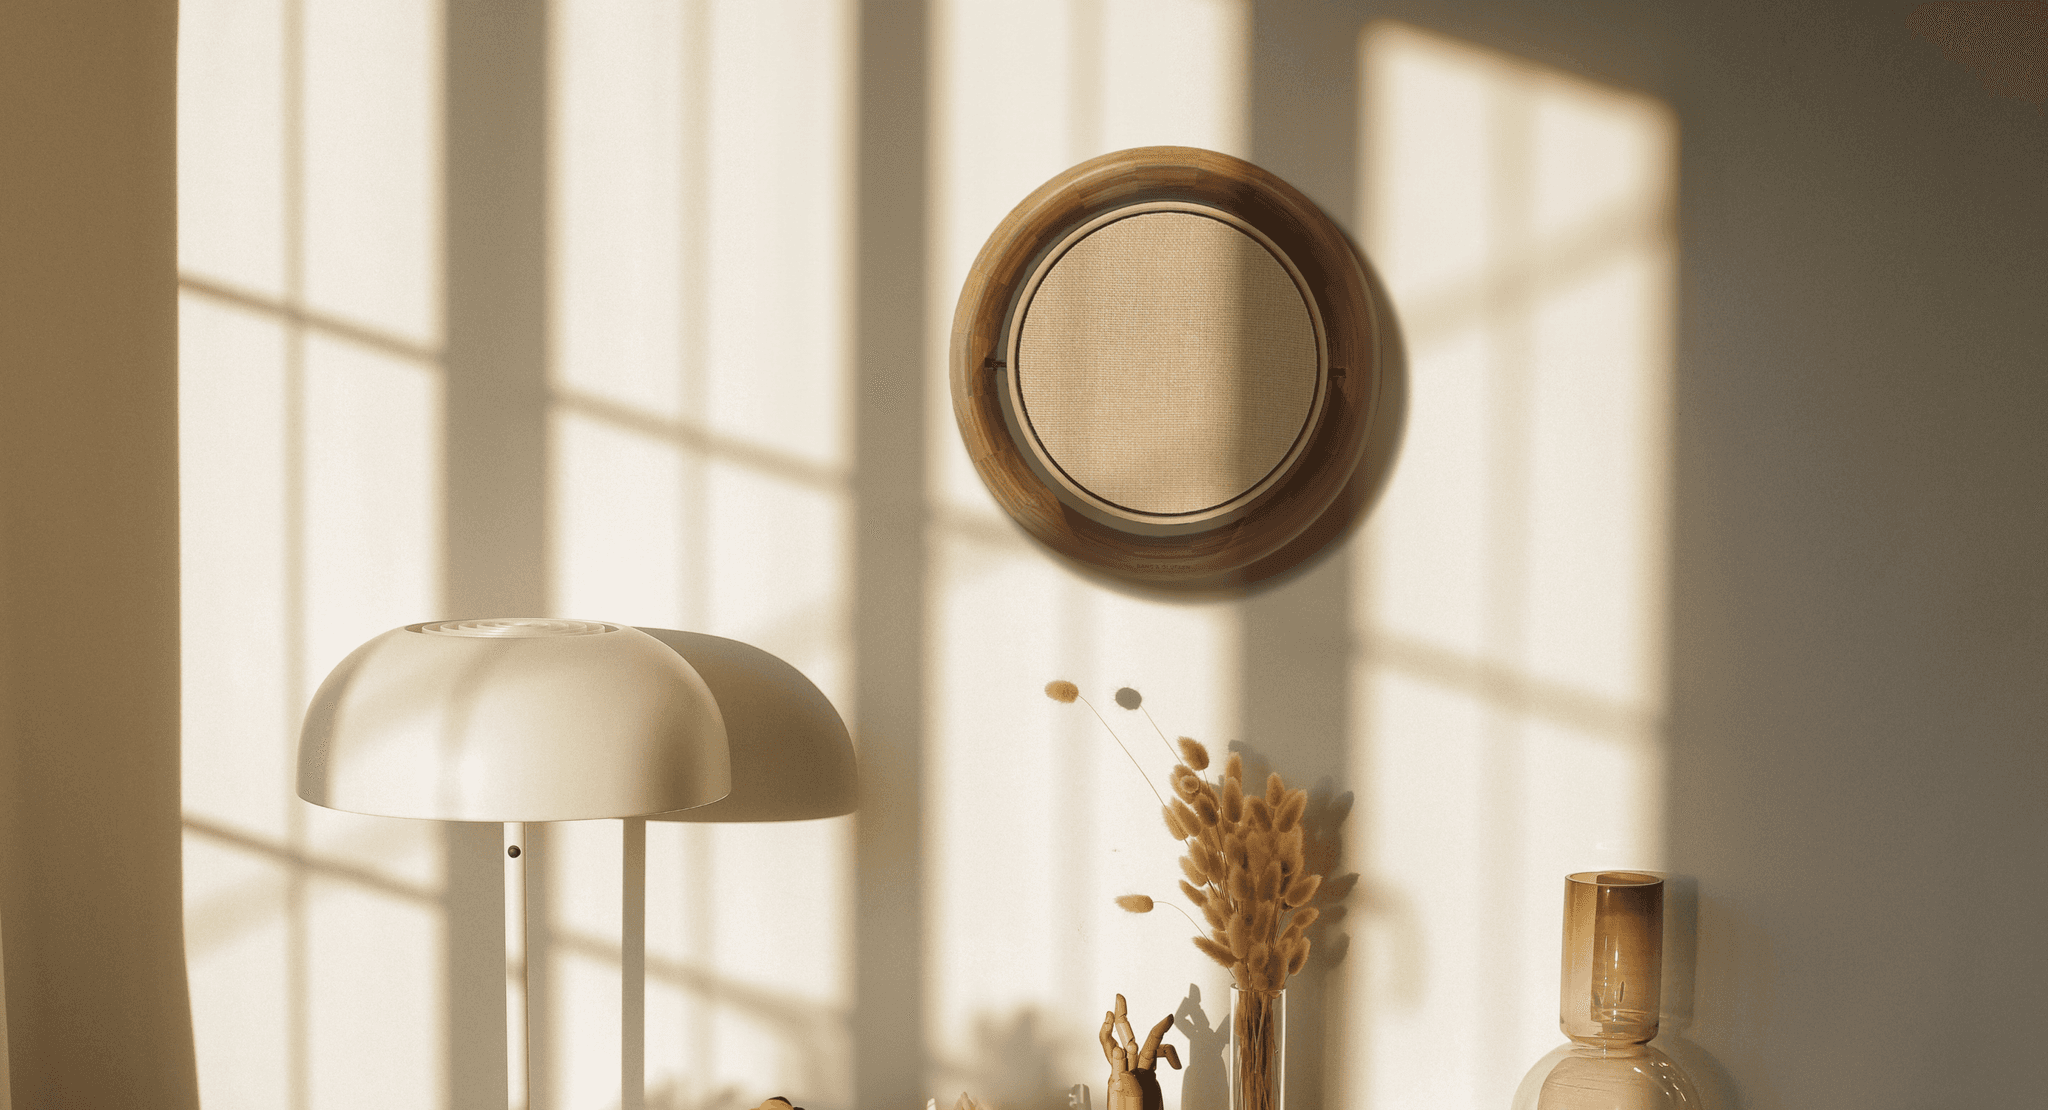
The Halo
Making the Halo required math and creativity to make it fit functionally into the design.


Mill and Lathe
The mill and the lathe were especially useful during the course of this project. I could say I became very versatile in them.
Paint
I learned how to sand and polish paint, to create a very shiny, smooth finish.